I was inspired to write this guide after viewing a number of big band videos on Facebook and YouTube. I was appalled by the poor quality of the sound in many of the videos, including some professional productions with pretty good visual values. Obtaining good sound when recording a jazz big band does not have to be complicated or expensive. I will detail here some simple methods for obtaining greatly improved sound quality when making video recordings of big bands, using inexpensive equipment. - Robert Auld--December, 2013
CONTENTS
BIG BAND AUDIO FOR VIDEO: RECORDING PROBLEMS
A video camera is used to record a jazz big band in live performance. Some attention has been paid to the visual quality--the camera provides good, high definition video and works well in available light conditions. It may even be used with a good tripod, which assures a steady picture. However, the sound is picked up by a camera-mounted microphone. The result sounds distant and lacks the "presence" we expect from a good sound recording. Vocalists and horn soloists, heard through the sound system loudspeakers, have an unpleasant hollow coloration. Further, even if the camera mike is a stereo microphone, the recording tends to sound monophonic. We have all heard video recordings of big bands that sound like this.
We have also seen, on YouTube and elsewhere, videos of jazz big bands that feature professional studio camera work and poor, monophonic sound, sometimes picked up from a single microphone somewhere out of sight. We have this magnificent ensemble, the glory of American music, and yet both amateurs and professionals do not seem to know how to record it.
Making a good big band recording need not be complicated or expensive. The jazz big band is primarily an acoustic ensemble that can be picked up with a simple microphone array, augmented by a few spot mikes. Some first principles:
- Microphones do not hear like human ears do. A performance that sounds good from a given position out in a room can sound bad when recorded from a microphone in the same position. This is so because:
- Our ears can distinguish between direct sound from musical instruments and reflected sound from the walls, floor and ceiling of the room. Microphones make no such distinction, and when the direct and reflected sound is mixed together and reproduced by loudspeakers (or by headphones), the results are often poor.
SOLUTIONS, PART 1: MOVING IN CLOSER
If we can move our main microphone position closer to the band than the typical main camera position, we can obtain much improved sound, as the ratio of direct to reflected sound will be changed. At a certain distance, usually fairly close to the ensemble, this ratio will be fifty-fifty, that is, half direct sound to half reflected sound. This is called the critical distance.
For clear pickup of a big band, our main microphone pickup needs to be somewhat inside the critical distance. While this distance will vary depending on the acoustics of a particular room, placing a stereo microphone centered on the front row of saxophones, between 4 to 6 feet in front of them and about 6 to 7 feet up, will generally do the trick. Using a stereo microphone will ensure a clear stereo image of the band, as well. As a general rule, in larger rooms (concert halls, large ballrooms) the main pickup can be a little farther back. In small rooms--many nightclubs, for example--closer placement will work better.
We could send this stereo microphone signal directly to many of today's video cameras with appropriate adapters. However, there are advantages to recording the sound track on a separate audio recorder and adding it to the video recording later. This is known as a dual recording setup. Further, it is now possible to obtain good quality audio recorders that have more than two recording tracks for very little money. Example: the Zoom H4n will record to four tracks at once and can be obtained for about $250 US as of this writing (2013). I will show below how those extra tracks can be used to advantage.
[Note: I am assuming we have the standard big band layout of three rows of horns with rhythm section to the left, audience point of view. Where the saxes and brass are split left and right, things may become more complicated. See the addendum below.]
Return to Contents
SOLUTIONS, PART 2: EXTRA INPUTS
While the acoustic sound of the band will be picked up well by a properly placed stereo microphone, it is common to use a sound system to amplify vocalists and horn soloists. The loudspeakers of the sound system point out at the audience. Our main stereo mike is not positioned to hear these loudspeakers well, and so vocalists and horn soloists will tend to sound distant and hollow.
We can get around this problem by taking direct inputs from the sound system, or from individual microphones. Even the simplest all-in-one sound systems usually have a line level output on their mixer, in addition to their speaker outputs. This can provide a line level feed to our audio recorder of all the microphones going through the sound system. If this feed is recorded to a separate track on the audio recorder it can be balanced later in the recording during mix-down. However, as the mix within this feed will reflect what was being sent to the sound system, the balance between vocals and horns, etc., may not always be what we want.
A way around this problem may be available if the sound system uses a separate mixer. These often have auxiliary outputs that are separate from the main outputs. Each input channel will have a separate knob or fader controlling the feed of that input to the aux output. It may be possible, listening through the audio recorder on headphones, to correct any balance problems on the spot by adjusting the aux output mix.
Further refinement is possible if the mixer has more than one aux output: one aux mix can be used for vocals, the second can be used for horns. Or, the various sound system mike inputs can be rendered in stereo by assigning each of them to one or both aux outputs. If these aux outputs are post-fader (they obtain their signals after the main channel faders), the mix will reflect the levels the sound system engineer (assuming there is one) sends to the sound system. This stereo mix is then super-imposed over the main stereo microphone tracks during mix-down, resulting in a complete multi-microphone recording of the band.
Return to Contents
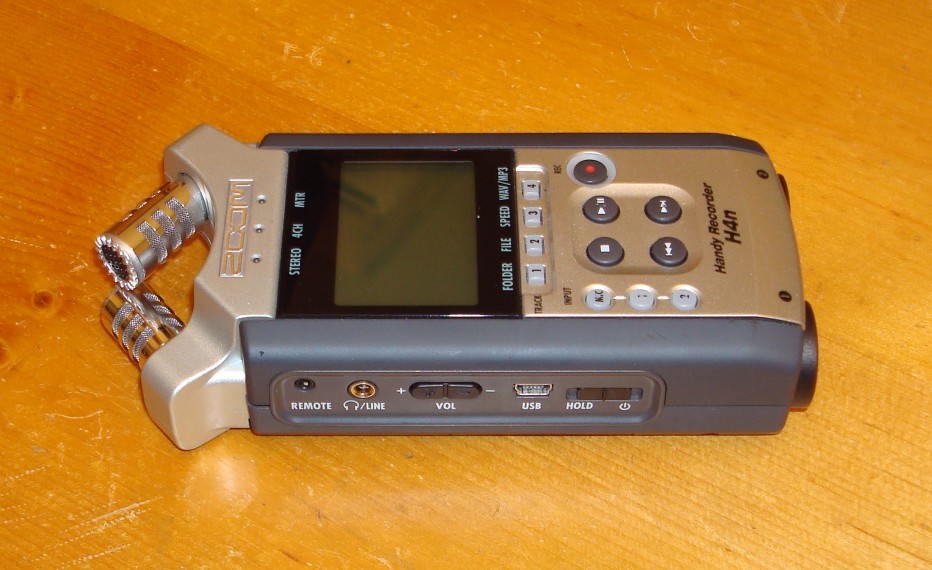
PRACTICAL CONSIDERATIONS WITH THE ZOOM H4n
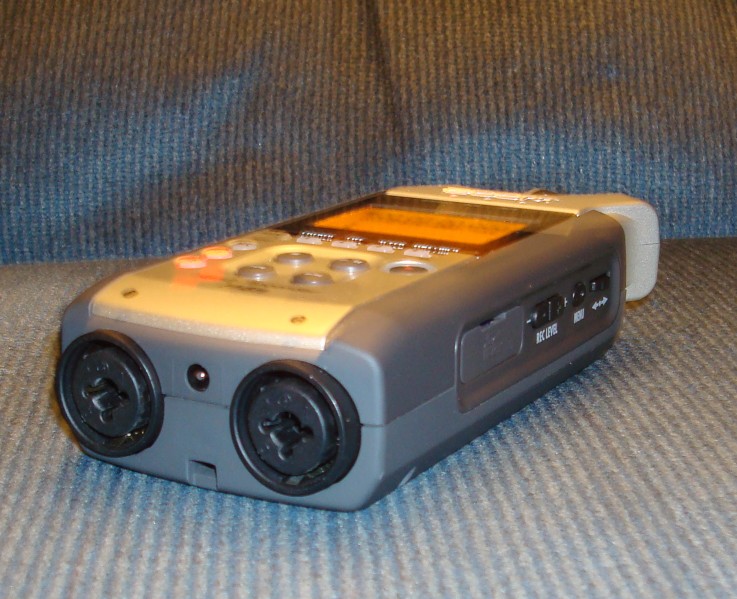
Zoom H4n digital recorder--a view of the combo jacks
It is possible to implement dual recording with various combinations of recorders and microphones. However, it may be done quite inexpensively with the Zoom H4n, so I will describe such a setup in detail.
The Zoom H4n has a built-in stereo microphone array of surprisingly good quality. Further, the H4n comes with an adapter that allows it to be mounted on a standard microphone stand using a standard mike clip. The H4n also has two separate microphone/line inputs (XLR/1/4 inch combo jacks) and will record from the microphones and the mike/line inputs simultaneously to four separate tracks.
As the built-in mikes of the H4n will be our main pickup, the machine must be placed on a mike stand in the proper position in front of the band. Lines can be run from the sound system mixer to the H4n's position as well. The drawback is, that you can't have someone adjusting levels on the H4n during the performance, as that will be a distraction--indeed, if the machine is about 7 feet up, it may not even be possible to operate the controls once it is placed.
Therefore, before the H4n is raised on the mike stand, a brief sound check should be done to set levels. In addition, the H4n has built-in limiters available to prevent recording overload, and these should be switched in. Once levels have been set, the H4n is installed in the recording position already running and records the entire set without further interruption. This does require a flash card of several gigabytes capacity (readily available from Amazon.com and other sources). If fresh batteries are in the machine, it will record continuously for at least 3 to 4 hours, which should be adequate for recording one engagement.
About the sound system line feeds: it may be possible to send the aux outputs of the sound system directly to the 1/4 inch line inputs on the H4n via cables with 1/4 inch tip/sleeve (TS) connectors. However, the H4n has what are called unbalanced line inputs (one hot connector, the second connector is ground-return) and noise may be picked up by those lines.
An alternative would be to plug the mixer aux outputs into standard direct boxes (DI's), such as are used to connect basses or electric guitars directly to sound mixers. The DI box will knock the line level signal down to microphone level, and the balanced XLR output of the DI can then be plugged directly into the H4n mike input using a microphone cable. This may solve some noise pickup problems.
Finally, note that it is possible to send the aux line outputs to a second digital recorder, with no connection to the primary one. Those files can then be synchronized with the main microphone files during mix-down.
Return to Contents
MIX-DOWN AND LAYING BACK AUDIO TRACKS
Laying back--inserting remixed audio into a video program
You have recorded your video and audio on separate devices and you now need to combine them together. The first consideration is synchronization of sound and picture. In the days before digital audio and video, maintaining sound sync required thousands of dollars of professional equipment which would record time code to both the camera and audio recorder. Fortunately, modern digital cameras and audio recorders don't really need time code. They have such good speed stability that, once we have synchronized the beginning of a recording, it will stay in sync with little or no adjustment needed thereafter.
To get our audio and video in sync, we do need a reference audio recording. We don't need this reference to be a particularly good sounding recording, but it does need to be in sync with the picture. The simplest solution is to use a camera-mounted mike to make the reference recording on the camera audio track when the video is recorded. When the video is loaded into a computer, this audio track goes with it. We then load in our separately recorded audio tracks and line them up with the reference audio track. Bingo! Instant audio sync.
If the sync drifts audibly after, say 15 minutes or more, the audio can be cut and realigned at appropriate points. The reference audio track is then muted when the final video is rendered, so we hear only the separately recorded audio.
A second way of recording the reference audio track is to send the mix of the recording microphones directly to the video camera, where it will be recorded in sync with the video. This has two disadvantages: 1) There needs to be a wired connection between the audio recording setup and the video camera. If that camera needs to be mobile, the wire may be hard to handle. 2) Many cameras that supply good picture have poor interfaces for sound, such as a single 1/8th inch stereo plug that accepts microphone levels only. Special adapters (by Beachtek and others) can solve this problem, but they do cost money.
Most modern computers already have available the software to accomplish video and audio editing on a very basic level--on a Mac you can use iMovie, on a Windows machine, Windows Movie Maker. Both programs will allow you to insert a separate stereo audio track in addition to any audio included with the video recording. However, they may not allow the addition of more than that single stereo audio track. If you have recorded four audio tracks with an H4n, you may need to mix down your audio tracks to a single stereo track before laying in your audio for syncing to picture.
Fortunately, this is not too hard to do. The dirt cheap method is to obtain the Audacity audio editor, which is available for free on both the Mac and Windows platforms. Audacity will allow mixing multiple audio tracks down to a stereo output. Things like adjusting relative levels and panning will likely be a bit cumbersome, but they can be done, and you can't beat the price.
If you don't mind paying for software there are, of course, video editing suites that allow laying in and mixing multiple audio channels. For example, I have used Sony Vegas (Windows PC) for the purpose with good results.
Return to Contents
AN EXAMPLE OF A BIG BAND RECORDING MADE WITH SIMPLE METHODS
Here is an .mp3 file of a live big band performance that was made with the method I have described: a single main stereo microphone in front of the band and spot microphone feeds from the sound system mixer.
Madness In Great Ones.mp3
Music by Duke Ellington and Billy Strayhorn, from their suite on themes of Shakespeare, "Such Sweet Thunder". Performed by the Manhattan School of Music Jazz Orchestra, April 4, 1990. Recording by Robert Auld.
Video was not involved--the occasion was a live concert at the Manhattan School of Music. I was the sound system engineer for the concert, doing mixes for both front of house (FOH) and for onstage monitor speakers. I was asked to make a recording as well. Since my live sound duties took priority, I needed a setup that would work well without a lot of complication. I only had consumer level equipment available and I was recording live-to-2-track. The whole recording chain was analog--and not top level either.
Today, even inexpensive digital equipment can give you cleaner sound than what I was using at that concert. And yet, the recording sounds pretty good. I think this shows that if you get your main microphone in the right place and balance your spot mikes appropriately, you can make a good sounding jazz big band recording.
Return to Contents
DUAL RECORDING: IT'S WORTH IT
One thing I can guarantee if you try dual recording in the way I have outlined here: the sound you get will be vastly superior to what you can obtain with a camera-mounted microphone. This is true even if all you do is carefully place a digital recorder with built-in microphones in front of the band.
Audio recording is like real estate: the most important factors are location, location and location--in this case the location of your microphones. When recording music performances on video, the camera is often the last place you want your microphones to be. Use dual recording methods, which allow you to place your mikes properly, and your sound tracks will improve greatly.
Robert Auld - 12/27/2013
Return to Contents
ADDENDUM: RECORDING BANDS WITH SPLIT HORN SECTIONS
Some big bands perform with split horn sections: the saxes are on one side of the stage, the brass on the other side (usually in two rows) and the rhythm section occupies the middle. If you try recording such a band with a close-in stereo microphone, the rhythm section may tend to be too loud relative to the horns and the stereo image may be exaggerated.
One possible solution is to move the stereo mike back until the balance between the various sections is more even. In a large room with a big stage and high ceiling, this may work pretty well--the reflections from the room boundaries will still be soft enough for you to get a clear recording as your mike position will still be inside the critical distance. However, in smaller rooms, moving the mike position back may not be practical, and even in larger rooms, too much reverberation may make the result less than ideal.
In this kind of situation, the best technique may be to use three or four separate microphones to cover the band--for example, one mike in front of the saxes, a second mike in front of the rhythm section in the center and a third mike in front of the brass. These three mikes are then plugged into a small mixer and panned left, center and right respectively, to approximate the onstage positions of the players. The resulting 2-channel mix is sent to two tracks of the audio recorder. The sound system feeds are sent to the other recorder tracks (which can even be an entirely separate audio recorder), as I have described previously.
This setup is still simple enough that one person can run it and run a camera as well. It requires additional microphones and cables and a small mixer, so there is some additional expense, but it should be within the reach of many big bands.
Of course, it is possible to use much more complicated setups to record the audio for a big band video--one can obtain split feeds of all the microphones onstage and send them to a multi-track audio recorder with 16 or more channels for example. But such methods are beyond the scope of this article, which is based on the premise that good big band recordings can be made with relatively simple, inexpensive methods.
Return to Contents
Copyright 2013, Robert Auld
Return to the top
Back to Robert Auld Home Page
|